Days of 3D | Vol. 1
Days of 3D is a journal focused on 3D development and exploration, with focus on a given base workflow. The first in the series, Vol. 1, explores Rhino 3D, Grasshopper, and V-Ray as the components for the base workflow.

In the last month, December 2021, I decided to pick up a small-scale rendering challenge as a preemptive test for, hopefully, a longer series that will explore the 3D realm and its vastness. To better frame the series with some guidelines, every Volume will span across a month, chronicling a daily exploration of software and creativity, noting key details along the way, and always creating at least one output image to reflect progression.
To start, I noted my base hardware, software, and premise for this Volume:
Hardware:
Laptop: MSI Gaming GS65 8RE Stealth Thin, 15.6"
OS: Windows 10 Pro
Processor: i7–8750H 2.20 GHz, 6 Cores
Graphics: NVIDIA GeForce GTX 1060
Internal memory: G.SKILL Ripjaws Series 32GB (2 x 16GB)
Software:
Rhino 7 (Grasshopper Included)
V-Ray 5
Premise:
Create 3D scenes and render them out, using a combination of generative design, modeling, and assets, while keeping the amount of time for scene creation to a minimum (i.e., less than 4 hours). Rendering the scenes is not included in the time minimum.
SIDE NOTE:
From a computational designer’s point of view (aka, me), this is really just an exploration of software, workflow, speed, and computing power. Over the years, I have often found speed to be a catalyst for argument and frustration (naturally), which led me to ask the following question:
“Is it the lack of enough computing power, or is it poorly crafted workflows?”
While is it true that in certain cases limitless computing power is absolutely preferred (i.e., try rendering a physically correct simulation in Houdini on the specs listed above), it can lead to sloppy problem-solving. Crafting an elegant solution can often perform just as well, and additionally, provide insight into the issue at hand. These Volumes will hopefully shed some light on this particular topic, with the hope of some interesting discoveries along the way.
Day 1-2:

For the start of the challenge, I wanted to create a parametric version of King Kai’s Planet, quickly realizing creating a parametric system for the world in Grasshopper is not the most suitable workflow for fast scene building. The key takeaway here was leveraging the advantage of modeling and materializing certain assets (such as the house and well), while leaving the parametric workflows for other assets, such as the trees and road.
To achieve the toon aesthetic, I explored the various ways to apply contours within V-Ray. Specifically, there’s a global contour setting and then there are local contour settings per material. This immensely helped create a nice base layer of linework, while adding custom linework settings to certain materials. Next, the grass, which does not benefit from contours, was rendered with V-Ray Fur and controlled setting, spreading the strands per mesh face instead of per surface area. Lastly, some minor compositing in Photoshop for the sky and minor cartoon-like edits.
Day 3:
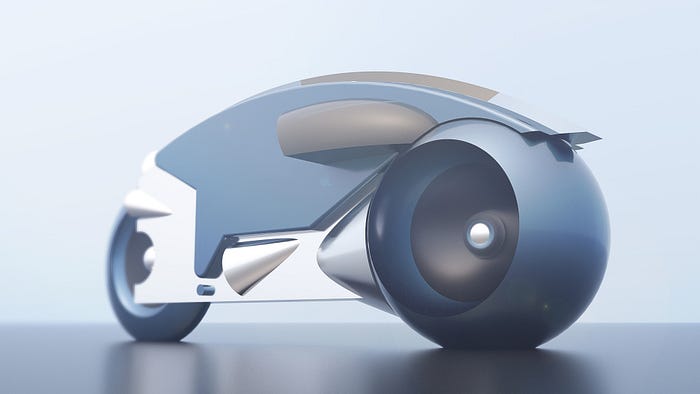

If you’ve ever watched Corridor Crew, then you may have seen one of their many (hilarious) reaction videos. Aside from being humorous, they’re incredibly informative for anyone interested in 3D. They had posted a video about the original Tron, in which they reconstructed the Tron Lightcycle, explaining it was mostly just modeled through primitives and booleans. Out of curiosity, using only primitives and guidelines, I gave it a shot.

As you may be able to see in the diagram above, by deconstructing the original Tron Lightcycle, one can start to see how the original designers used what they available to them to create (in my opinion) a cool bike design.
Day 4:
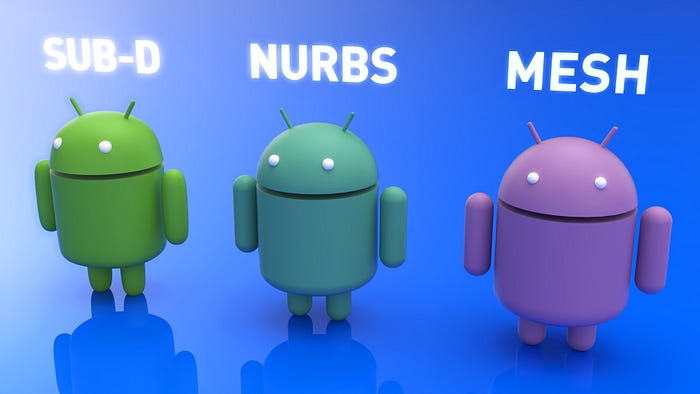
Modeled as a teaching exercise for an impromptu course I am teaching my buddies, I decided to explore a simple design that quite literally exists everywhere (or at least, most of us have seen before): The Google Android.
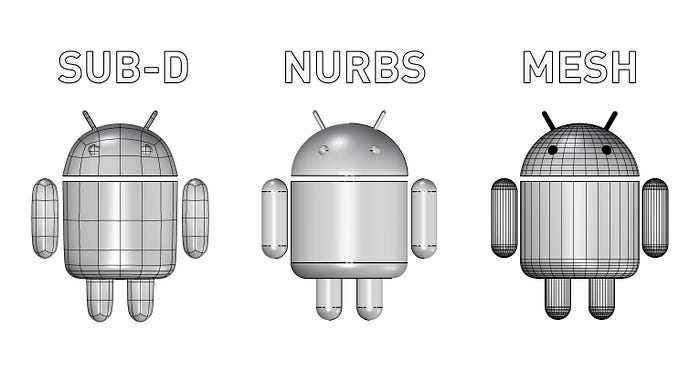
A nifty little thing, I modeled the same thing using three different geometry workflows: SubD (now in Rhino 7!), NURBs (CAD focused), and Mesh (traditional polygonal modeling). The takeaway here? Mesh operations are severely lacking in Rhino. That said, you can use most SubD operations on a Mesh, which is still quite a flexible workaround.
One thing: The benefit of using Rhino commands (as opposed to Grasshopper) to model anything can be an extremely fluid process, albeit some key functions missing. Although the advent of the Grasshopper Player could help close this gap.
Day 5:

What I thought was a simple daily feat became an overly ambitious challenge that got too caught up in irrelevant details. Let me explain:
In short, this was an attempt at modeling the Tesla Cybertruck, in NURBs, as fast as possible using found elevation drawings online. The mistake? Trying to replicate exactly what I saw on the drawing instead of taking design liberty to make adjustments. During my time in architecture school, this was a mistake many peers also committed, as opposed to focusing on creating a holistic product. The takeaway? Create first, finesse later.
Day 6–8:

Do you know about Noise? Perlin Noise, to be exact? It's an incredibly useful algorithm used extensively across various design workflows and tools. I was tasked to develop a series of tessellated designs that used varying reflective properties and a field of triangles undulating in a non-repetitive fashion. This is the perfect problem case for applying Noise algorithms.
The problem? Rhino does not come with an easy-to-use noise toolset.
The solution? Write my own Noise Toolkit for Grasshopper (and I did). Unfortunately, I cannot share much more yet, as this is currently part of a larger project that will be soon be revealed. Stay tuned!
Day 9:


So, a while back, I had started developing a plug-in for Grasshopper with an unusual name: Stripper. It got published, and I’ve been slowly improving over time. The focus? Functions to work with Mesh Topology in an easy and responsive manner. It definitely needs improvement (trust me, I have a backlog of bugs I need to fix), but it works great so far. The image above is part of personal research I’ve called “Bodyloops,” which explicitly uses the plug-in to discretize the host (the woman) into a series of topological bands.
One more thing: Incorporating DAZ Studio into the Rhino+V-Ray base workflow for this challenge allowed me to quickly explore rigged characters and reduce time spent creating assets.
Day 10-11:
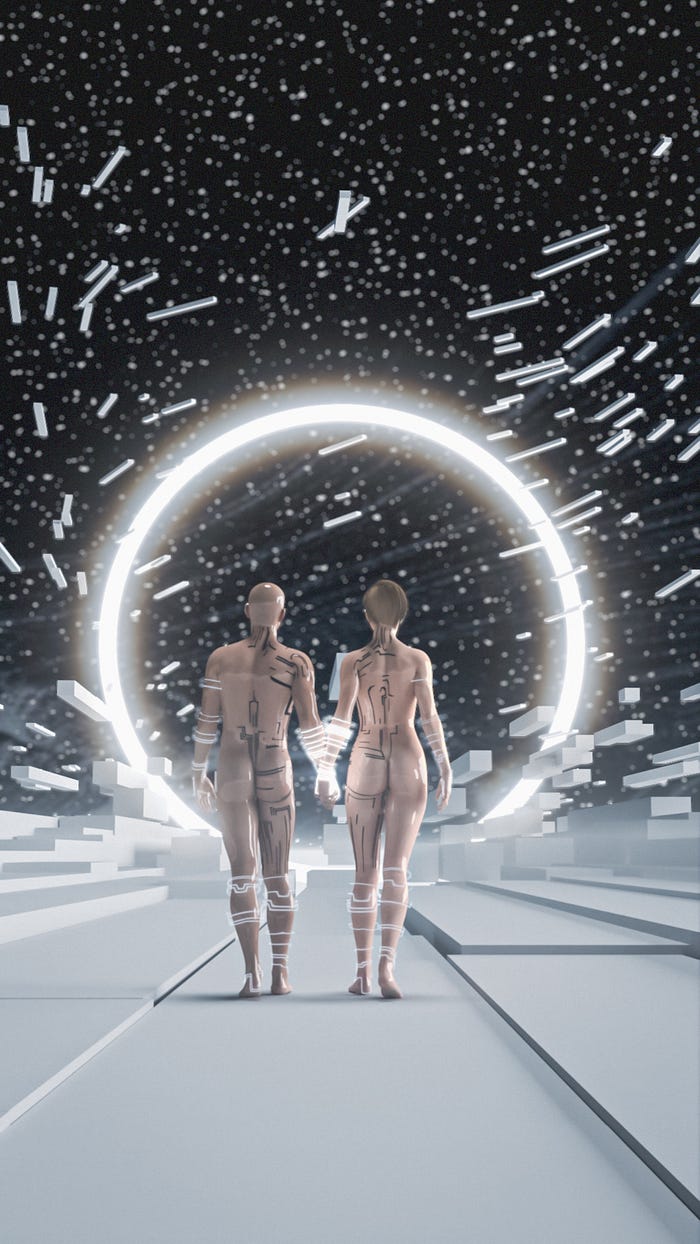

Going off the previous day, I decided to create a scene loosely inspired by the mind-bending game Control. The workflow embodied the following:
- Rhino to create the base plane, the light ring, and the background dome.
- Grasshopper to evolve the base plane into the floating blocks.
- DAZ Studio to create and pose the male and female characters.
- Stripper to create the body markings (black and emissive).
- V-Ray’s Bloom effect (you can find this in the VFB) and Fog.
Day 12:

SubD in Rhino strikes again! On a serious note, having the SubD workflow within Rhino really unleashes the potential of what it can do and how it can be used as a design tool. Although this little floating head, inspired by Tim Burton’s Nightmare Before Christmas, was modeled completely through SubD. For some context, I needed something that shared the same vibe as the movies, so I opted for creating a box which I populate with points that ultimately tiny emissive spheres.
To get a bit more of a ghostly effect (at least, an attempt at it), I used V-Ray’s Fog along with the Bloom effect. In order for the emissive spheres to appear with a vertical light streak, I played around with “Lens Scratches” and “Lens Streak” options in the V-Ray VFB (the window that shows you the render).
Day 13–14:


This particular challenge, encompassing two days, one day of scene set-up, and one day of purely rendering experimentation, was a tough one. Having taken notes from the first two days (King Kai’s Planet), I wanted to see if I could incorporate the OpenGL Mesh Shader in Grasshopper, in order to achieve a bit of a cel-shaded look.

The filmstrip above shows the images as they came out of V-Ray, excluding the fourth image. That’s only the first step. To achieve the look I wanted, I had do a good amount of compositing work in Photoshop to make sure certain things blended correctly, and the V-Ray Render elements became incredibly important for that, especially for isolating certain portions (like the grass). The exception here, the OpenGL Shading, was actually just a screenshot of the viewport, and that required a bit of finesse with filters in Photoshop in order to blend in properly and not overpower the image.
Ultimately, it was an interesting render test. Though the result is not my favorite, it provided a ton of insight into other ways to properly get a 2D3D and/or cel-shaded look from Rhino + V-Ray.
Day 15:
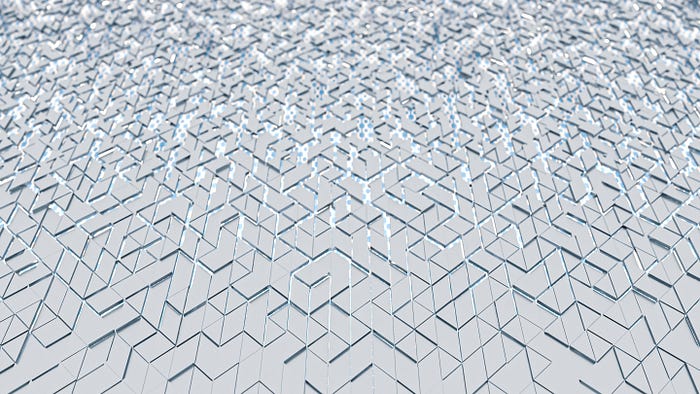
The undisclosed strikes again! Can’t write much, but there’s definitely a lot of experimentation with triangles and layering.
🤷
Day 16:


For this daily challenge, I reprised the workflow from Day 9, but instead, I wanted to spend time focusing on material properties and rendering details.
Typically, when you load a rigged character in DAZ studio, they come textured but without clothes. Since I was going to generate a bodysuit using Stripper in Grasshopper, I didn’t care for the lack of clothes. But I wanted to have a duality, almost like an android (literally) reflecting on its human self.
As opposed to rendering twice and compositing, I opted for a geometrical trick: Mirror the original character, resulting in two, create a thin solid that sits between their knuckles, and apply a water material to it. Due to the material’s properties, and the distance between the characters and the water solid, you get a nice duality reflection effect.
Day 17:

A fun and short daily challenge, this looked at using the Stripper plug-in for Grasshopper and applying it to a non-organic object. The result? A futuristic city block.
In terms of workflow, it went through the following steps:
- Define base rectangle, fill it with random points.
- Compute voronoi cells from the points within the rectangle.
- Create two offsets of the cell: one for the lot, one for the building base.
- Randomly extrude the building bases and apply a Quad Remesh per mass.
- Per building mass, topologically strip bands starting from a random face.
- Group the bands into chunks (i.e., 20 bands are partitioned into groups of 2 and 5), and join the meshes in those groups to create one mesh per group.
- Split groupings by size, to get glazing and facade portions.
- Next, on the facade portions, tesselate, give a gap between pieces, and offset.
- Lastly, put the view in Isometric mode, add some materials, and render!
Day 18:
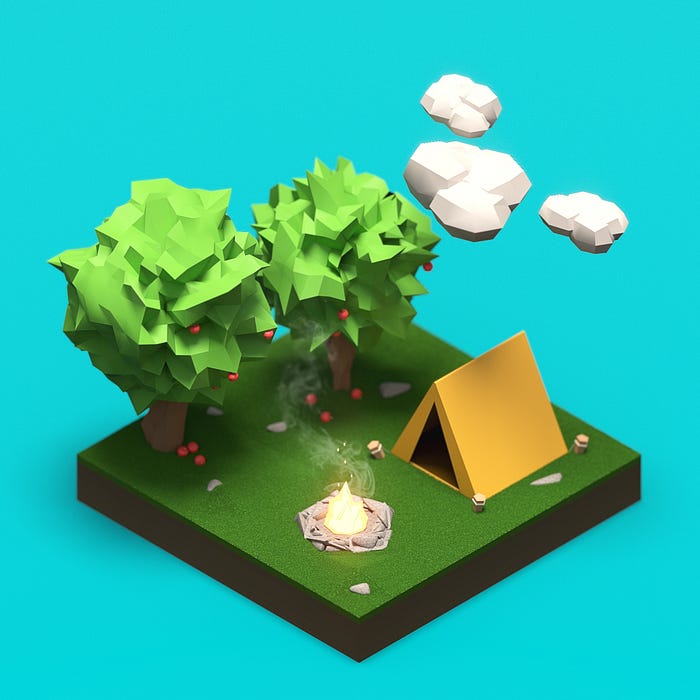
Following the previous day’s workflow, I decided to explore a low-poly-esque look with a camping scene. For the trees, I was able to apply the Noise Toolkit I developed for the undisclosed project for a super funky low poly tree. The only thing that could have used another iteration would be the rocks by the campfire, as they’re not quite right in terms of the low-poly style.
Day 19–20:
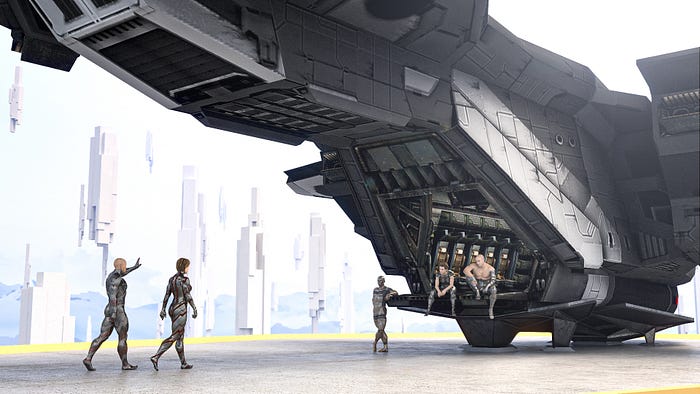

This challenge is heavily (if not obvious) inspired by Halo. Harnessing some of the previously established workflows, I wanted to explore how quickly I could create an entire scene that could be reminiscent of concept art for a game. After acquiring the Pelican asset (the ship) and tweaking it a bit, I was able to focus on simple elements to construct the rest of the scene.
The takeaway? Well, a few.
- Using Aerial Perspective under V-Ray’s Volumetric Environment Options, I was able to get the hazy, somewhat washed-out look that we see in real life when things are incredibly far away in the distance.
- Blocking (a tactic commonly used in 3D scene creation and videogame environments) is incredibly useful for conceptual exploration. The floating objects in the distance started out as large boxes that I positioned in space to get a feel for how the scene should look.
- Use images for background! If you’re doing a relatively fixed view, pop in an image (which is a 3D plane with a texture in Rhino) and position it to fit your view.
Day 21–22:
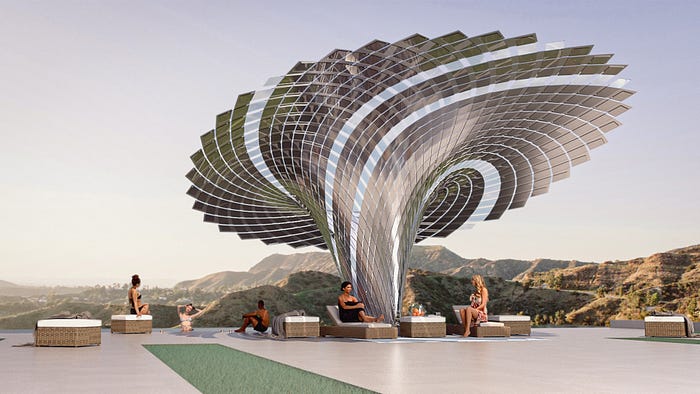

This actually started out as an example file for Stripper, but then became part of this series. A relatively simple setup, I realized I hadn’t explored V-Ray’s asset library, known as Cosmos. Essentially, the only thing modeled here is a base plane, an odd patch of grass, a pool, and the pavilion. The rest? All assets that were directly accessed through Cosmos. If you have access to it, definitely take advantage of it.
Day 23:
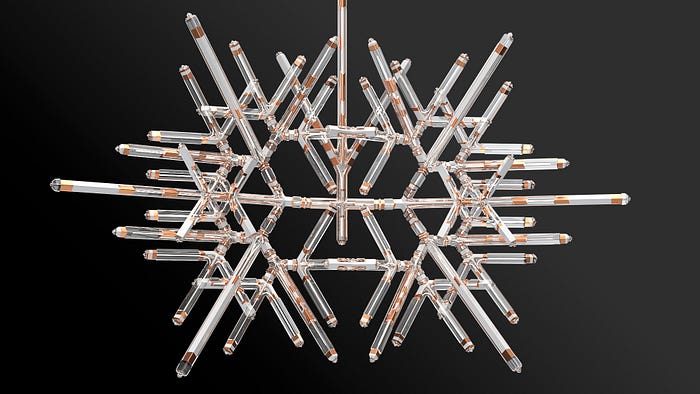

An incredibly simple setup using a custom L-System I wrote a long time ago, in hopes of creating a cool snowflake-esque object. It was inspired by this photographer’s crazy images of snowflakes.
Day 24:

With Christmas eve settling in and not a lot of time to spend on the challenge on this day, I looked at the Cosmos Assets and speculated on how to achieve the minimum amount of modeling. They happen to have added a nice selection of Christmas-related assets, so I figured, why not use them all (or most)?
The setup for this scene was a box, with the bottom face being wood slats material, the sidewalls and ceiling a plaster material, and the rest being a collection of assets. I added some emissive spheres, an invisible rectangular light looking into the room from the outside, and tweak the light settings to get somewhat of a moody evening in an apartment.
Day 25:

Following the previous day’s workflow, I took a ton of present assets and a few character assets from my favorite videogames, played with scaled, and created this videogame-like scene.
Day 26:
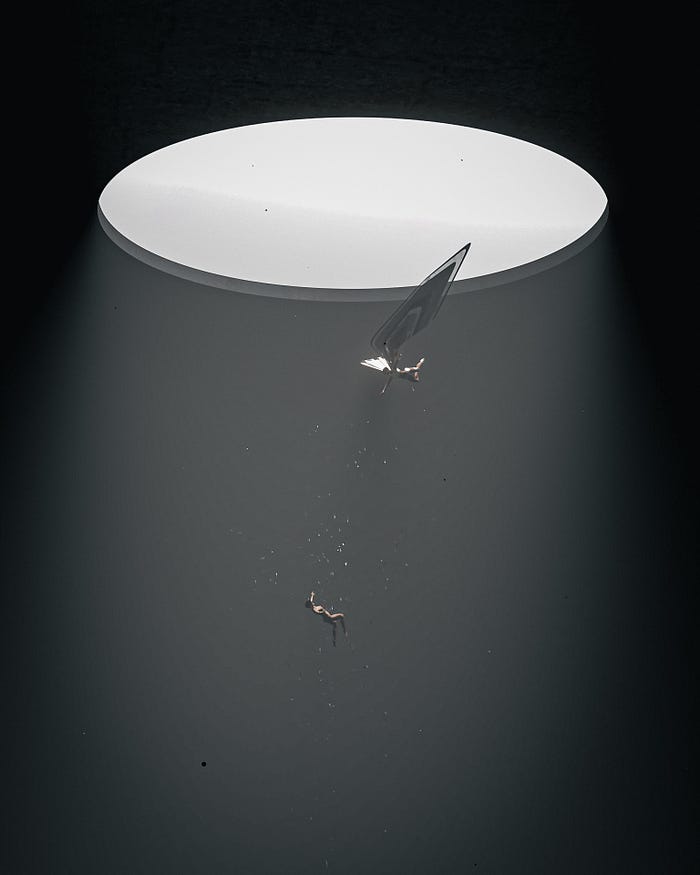

This day focused completely on one thing: Creating volumetric light. After tinkering around for a bit too long, I realized the setup was a bit more simple than I assumed. I created a box with a circular opening, set up my camera, placed the characters, and created a large rectangular light that covered the opening. By enabling the Volumetric Fog option in the settings, I managed to get the volumetric light ray. It did require a bit of play with the settings to get the light just right, and a minor edit in Lightroom (color adjustments, vignette).
Day 27–28:

Heavily inspired by the ominous forest in the show DEVS, I attempted (emphasis on attempted) at recreating a similar scene.
Takeaway: Scattering assets using V-Ray’s scatter function, such as grass and rocks, can potentially help speed up render times as opposed to using V-Ray Fur.
Day 29:
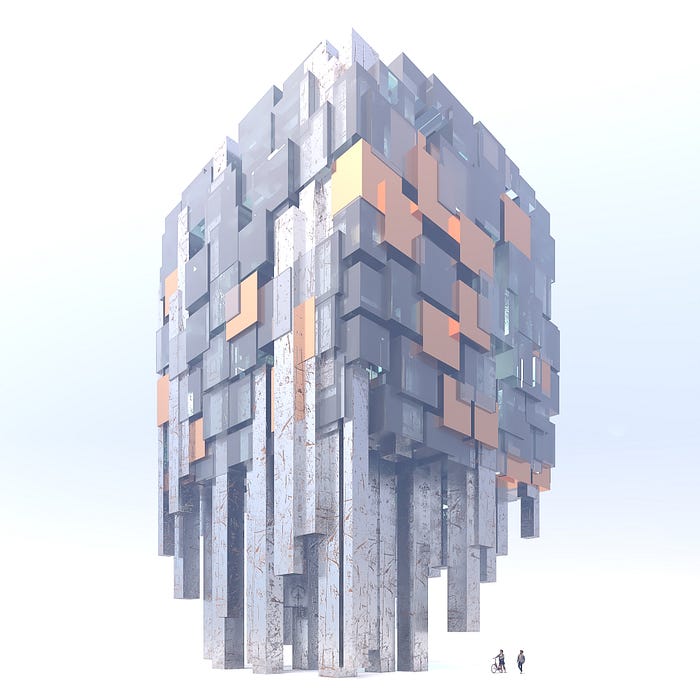

Two main takeaways here: Two Point Perspective view and Aerial Perspective Atmosphere can be incredibly useful for quickly creating concept imagery.
Day 30:


Loosely based on Reka Nyari’s photography show (on display at the time of writing here), this scene only used 3 Light sources and the bodyloops algorithms to generate tattoos on the character.
Day 31:
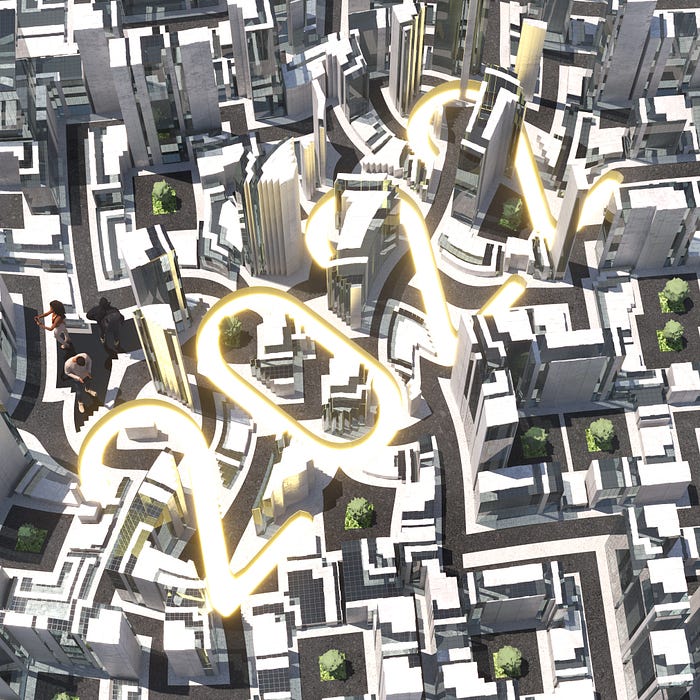
Hello. Goodbye. Congrats if you made it this far. Can you guess the workflow behind this shot? It's a mix of some of the aforementioned workflows.
Thanks for reading! Got any questions? Reach out or leave a comment. I’ll be happy to answer.
For now, I’ll be speculating a new workflow to explore for the next volume.
✌️
